
This tutorial takes you from an empty shop to your first priced product and your first finished print. It takes about half an hour. Have your slicer open with one model you sell, and a recent filament receipt nearby.
Nothing here is final. Every number can be changed later, and Works recalculates your costs and prices when you do.
The six steps
- Set your rates and taxes
- Add your printer
- Add a filament
- Save your first plate
- Make it a product and set its price
- Schedule a print, then finish it
1. Set your rates and taxes
Your rates are what Works uses to cost every print. Open Settings from the account menu (your name, top right), then click Edit settings.
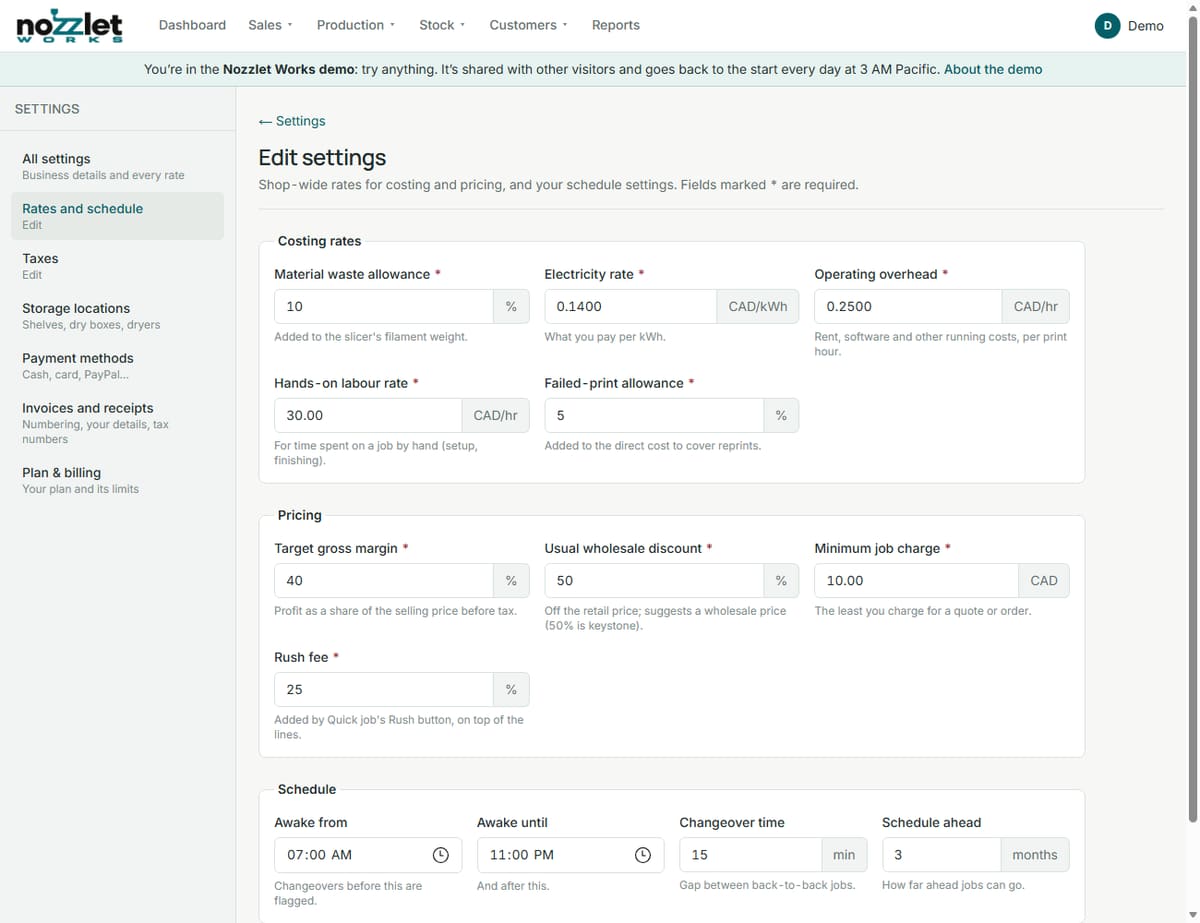
- Costing rates: your Material waste allowance, Electricity rate, Operating overhead, Hands-on labour rate and Failed-print allowance. These are added to every print's cost.
- Pricing: your Target gross margin (Works suggests prices that reach it), Usual wholesale discount, Minimum job charge (small orders are topped up to it) and Rush fee.
- Schedule: when you're awake (Awake from and Awake until), the Changeover time between jobs, and how far to Schedule ahead. Works flags jobs that would start while you're asleep.
Click Save. Then open Settings › Taxes and Add each tax you charge, for example GST 5% and PST 7% in British Columbia, or HST 13% in Ontario. Only charge taxes you're registered for.
Not sure of your numbers yet? Use a sensible guess and come back later. The free cost calculator and How to price 3D prints explain each one.
2. Add your printer
Each printer has its own costs, so Works can spread its price and wear over the prints it makes. Go to Production › Printers and click Add printer.
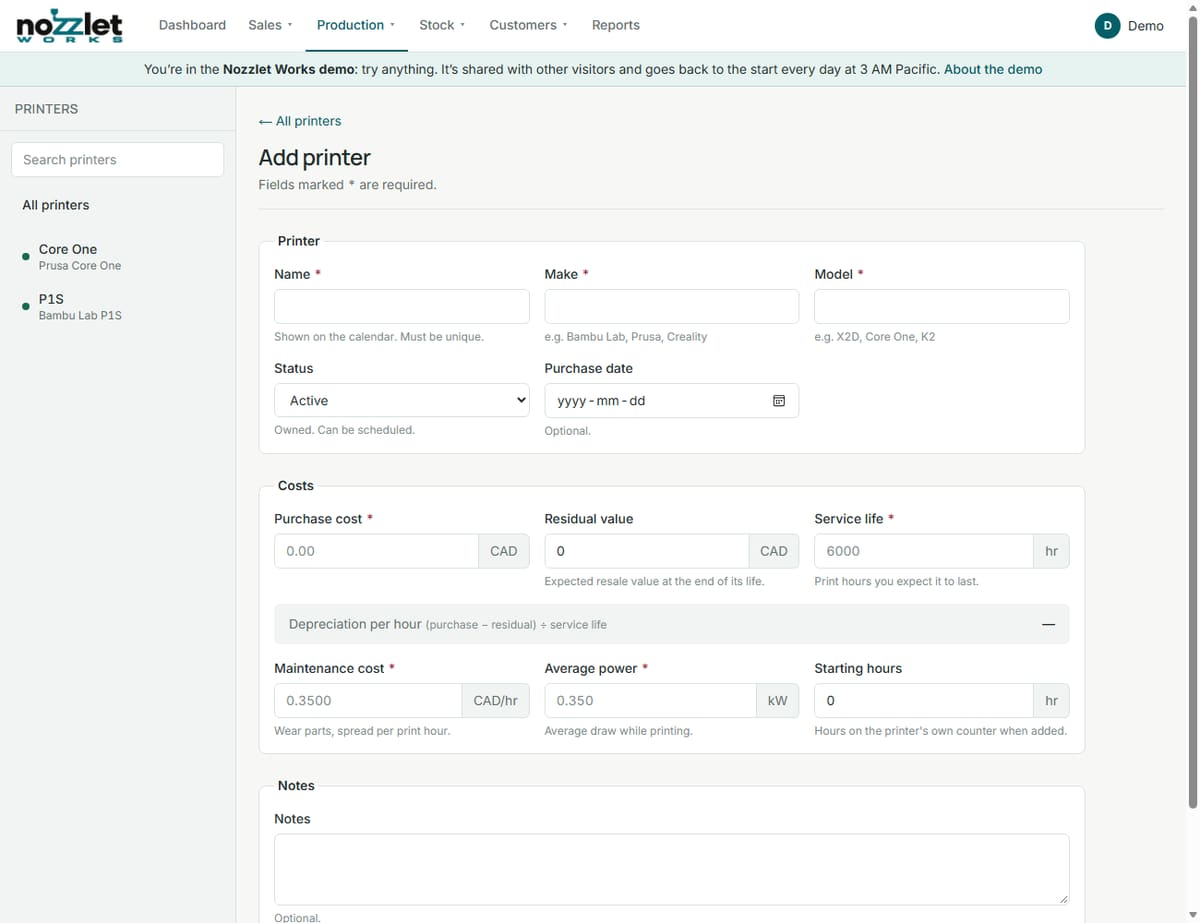
- Printer: a Name you'll recognise (e.g. "P1S"), its Make and Model, and its Status. Choose Proposed for a printer you're only thinking of buying: Works costs it so you can compare, but never schedules it.
- Costs: the Purchase cost, its Residual value (what you'd sell it for at the end), its Service life, a Maintenance cost, its Average power draw, and any Starting hours it already has.
Click Save. The printer's page is also where you'll later load spools into its slots, record nozzle changes and keep up with maintenance.
3. Add a filament
Go to Stock › Inventory and click Add item. Set the Type to Filament.
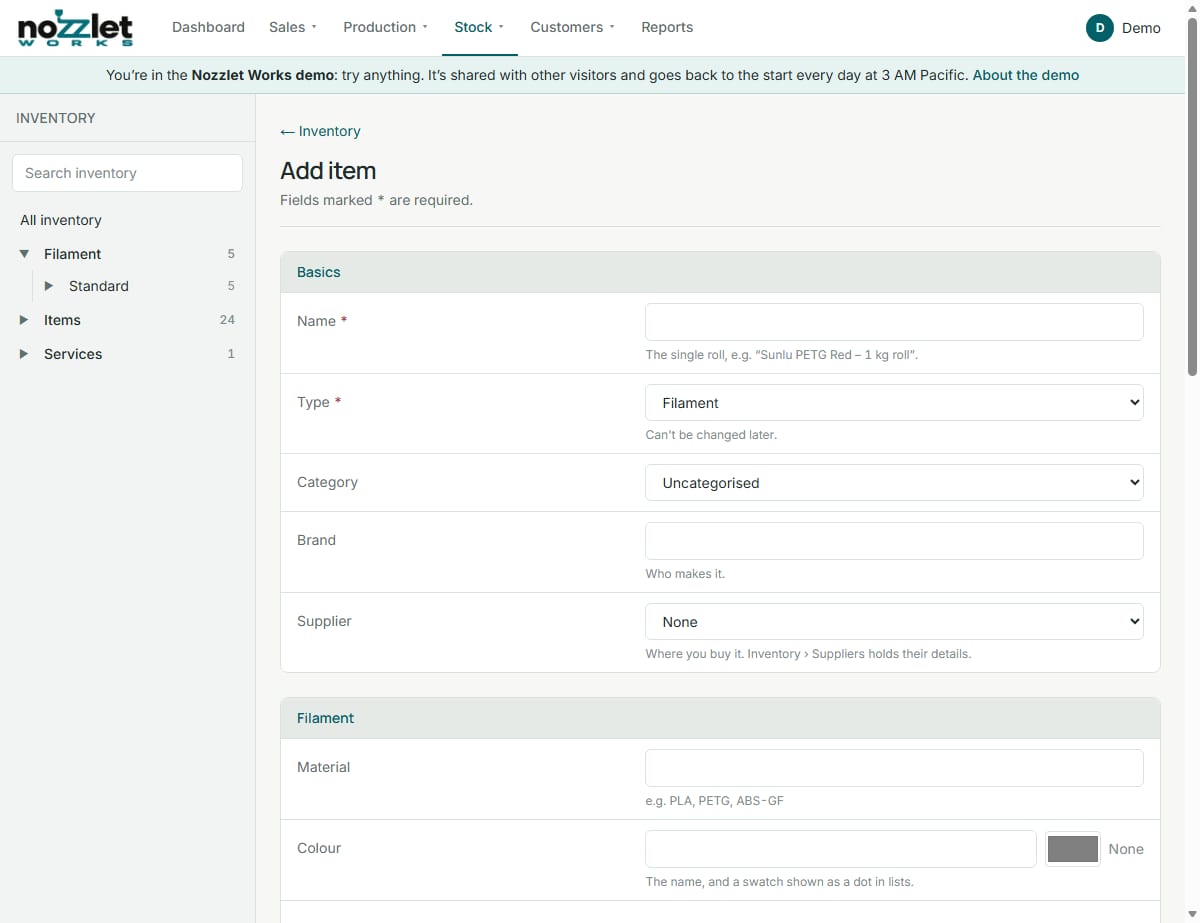
- Under Basics: give it a Name, and if you like a Brand and Supplier.
- Under Filament: the Material (PLA, PETG…), the Colour (a name, and a swatch if you like), the Filament per roll in grams (usually 1000), and the Empty spool weight (optional; it lets you weigh a roll to see what's left).
- Leave Kept as on Rolls, each tracked as a spool. Each roll you have becomes a numbered spool with its grams left.
- Under Buying and stock: the Purchase price you pay per roll, and a Reorder level if you want a warning when you're running low.
Click Save. To record the rolls you have on the shelf, open the filament and click Receive.
4. Save your first plate
A plate is a print setup you save once: the printer, the time, the filament and what comes off the plate. Costing and scheduling then just pick it. Go to Production › Plates and click Add plate.
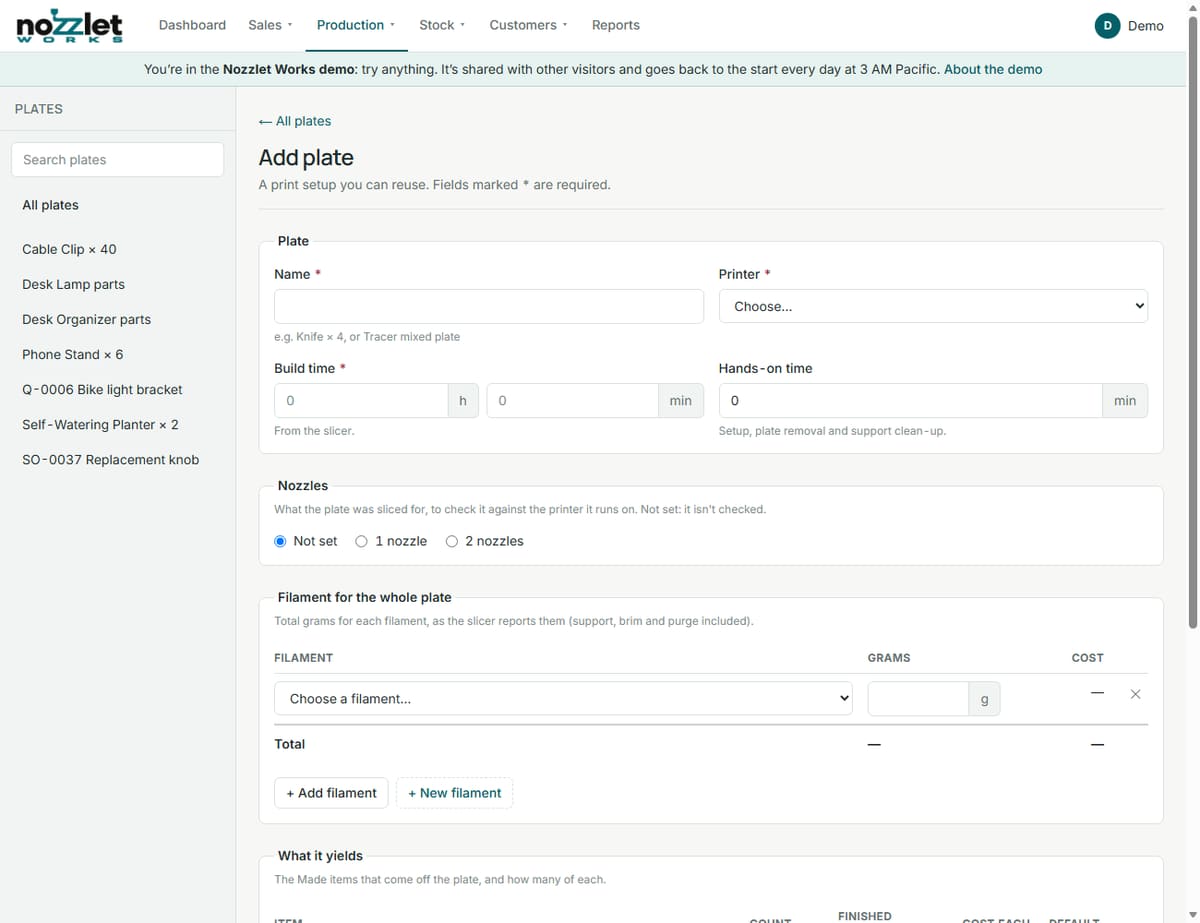
- Name it after what it prints, e.g. "Phone Stand × 6", and choose the Printer.
- Type the Build time from your slicer, and your Hands-on time: setup, taking the plate off, and support clean-up.
- Under Filament for the whole plate, choose your filament and type the total grams your slicer reports, including supports, brim and purge. For a multicolour print, use + Add filament for each one.
- Under What it yields, click + New Made item, name the thing you're printing (e.g. "Phone Stand"), and say how many come off the plate.
Click Save. The plate's Cost tab shows the full breakdown: filament (with your waste allowance), electricity, printer wear, maintenance, overhead and your time, plus the failed-print allowance, and each item's share.
5. Make it a product and set its price
The item you just created is printed (Made), and its cost is its share of the plate. To sell it, make it a product. Open it from Stock › Inventory and go to its Details tab. On the Selling card, click the Sold row (or Edit) and tick Yes: a final product you sell. Then type its Retail price (MSRP): one unit, before tax (tax is added on top).
It now appears under Sales › Products. Its Pricing tab shows the cost, your retail price, the profit (including profit per print hour) and the margin next to your target.
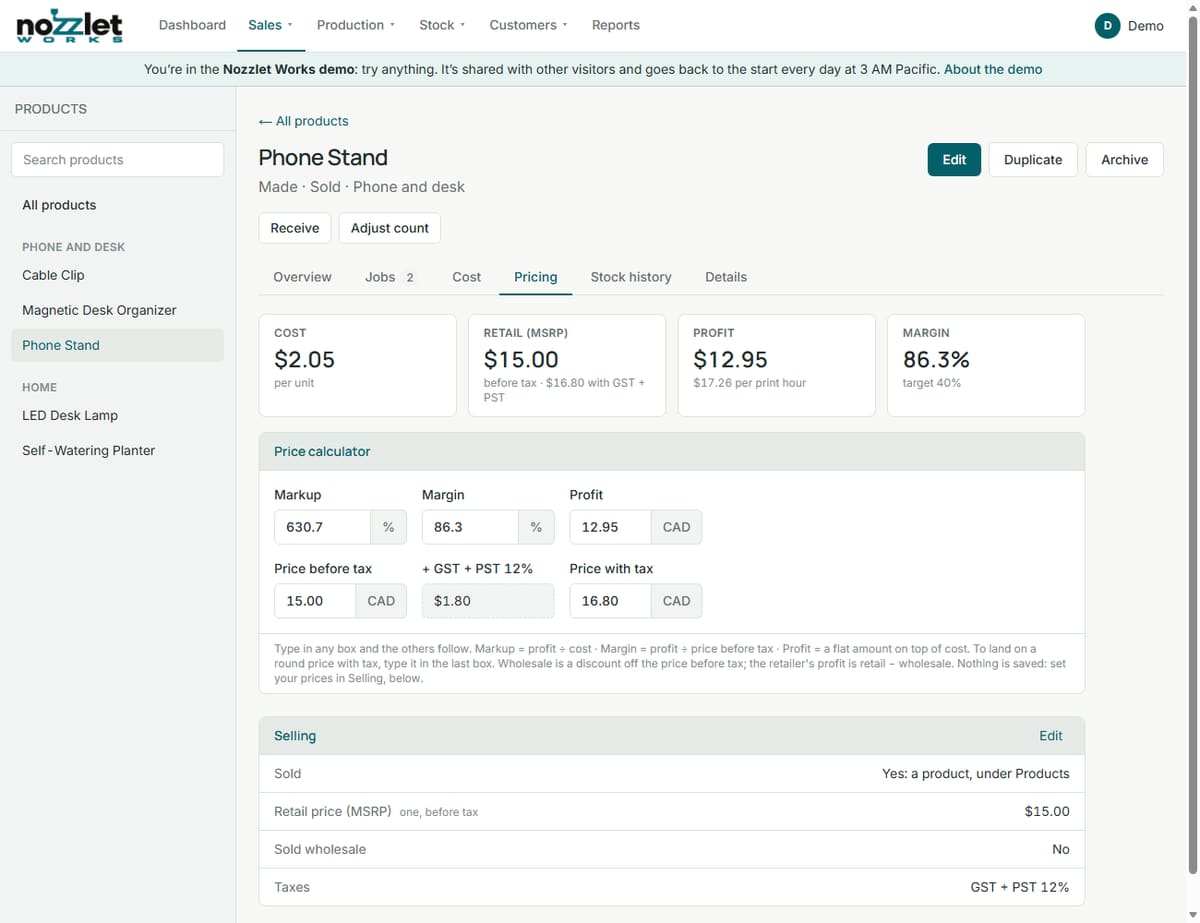
Not sure what to charge? Use the Price calculator on the same tab. Type a markup, a margin, a profit or a price (with or without tax), and the other boxes follow. It doesn't save anything: when you've found your price, set it in Selling.
6. Schedule a print, then finish it
Go to Production › Schedule and click Add job. Choose the Plate and the Printer, then How many times to print it back to back, and when to Start:
- After the last job on this printer (plus your changeover time, or now if it's free),
- At a date and time you choose, or
- Find a time: Works looks across all your printers and suggests the best places, such as the earliest finish, a gap before another job, or overnight.
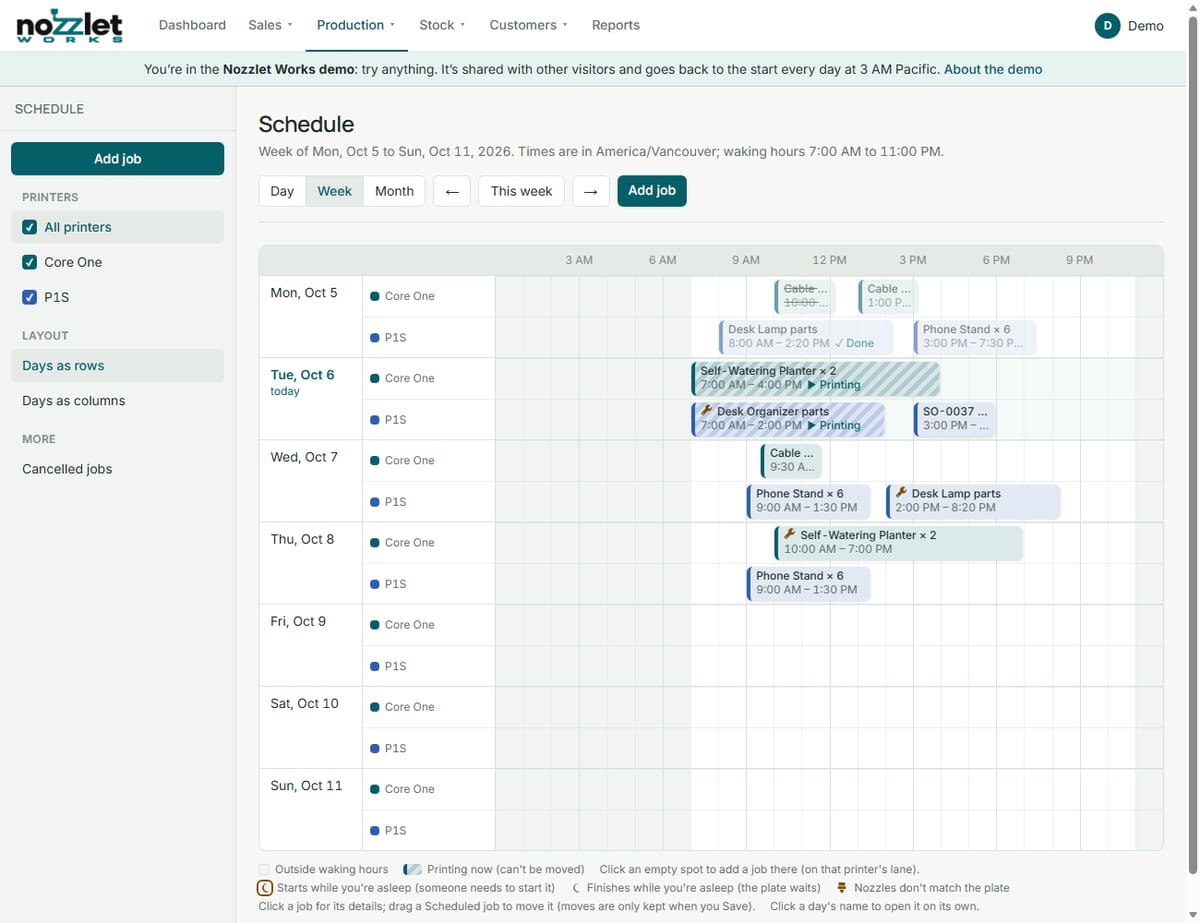
The job appears on the calendar. You can drag it to another time or printer, then Save your moves.
When you start it, click the job and choose Start printing. A checklist shows what's loaded on the printer and what the plate needs, so you can load or swap spools first.
When it's done, click the job and choose Finish job. Say how many came out good (the rest is counted as print loss) and how much filament was used (your slicer's grams to start with). Works marks the job Done, adds the good pieces to stock, and takes the grams off your spools. Made a mistake? Undo finish.
What next
Your shop is set up. From here:
- Sell at the counter with Quick job (on the Dashboard), or keep track of bigger sales with Quotes and Orders in the Sales menu.
- Check the Dashboard each day. It shows All good, or what needs attention: a print that's overdue, filament running short, low stock or maintenance due.
- Add the rest of your products, and use the Ranked view under Products to see which earn the most per print hour.
New words? See Words used in Works.